Unit 4: Typography
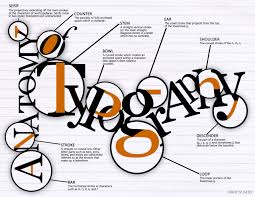
Assignment & quiz: Anatomy of text
Project 4: Art with Text
4.1
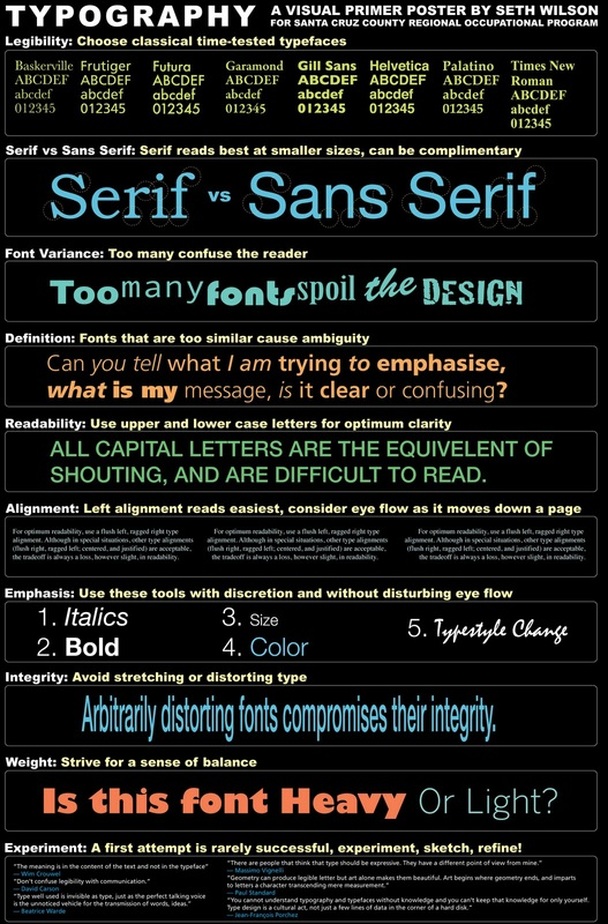
We will study and learn type classifications, font families, construction of a paragraph and the anatomy of typography. We will use fonts in Illustrator and the Object Distort Make with a Mesh tool to create an image. We will turn the font into shapes. You can decide if you want the text to be readable or just shapes.
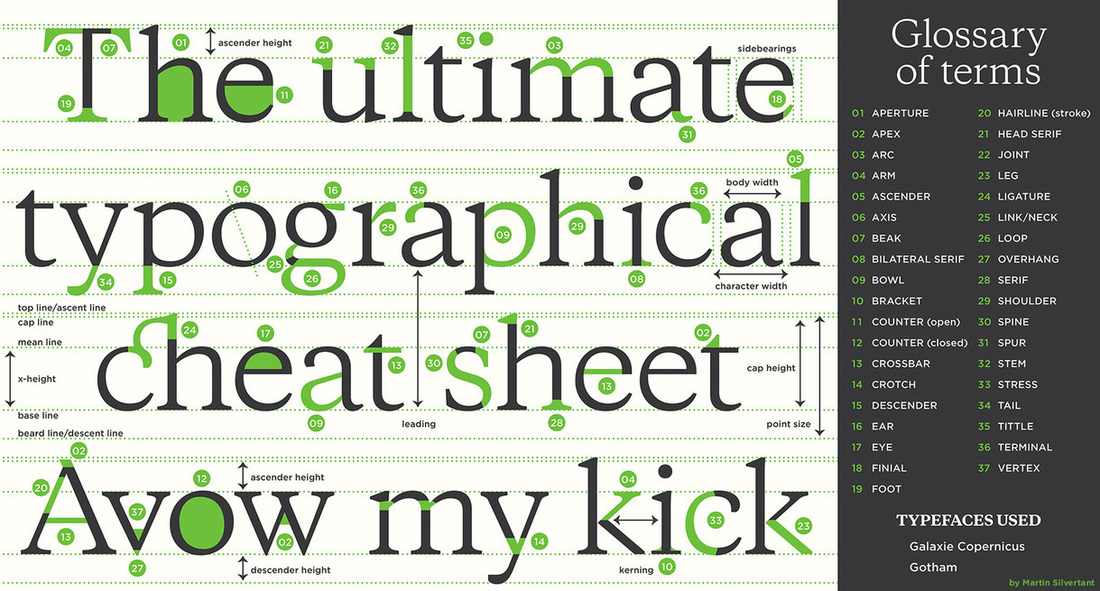
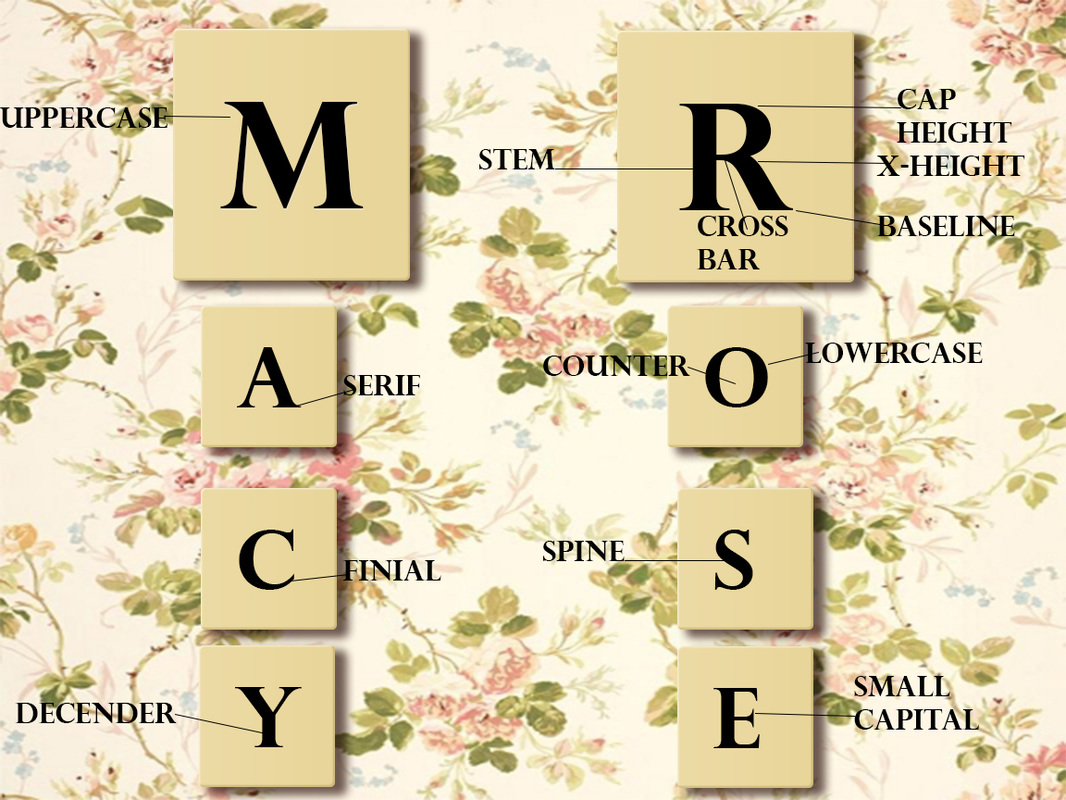
Typeface A typeface is a design created by a typographer or type designer. It incorporates the specific letter-forms that include the variations of stroke weight, the forms of serifs, the counter shapes, the finial styles, the lengths of ascenders and descenders, and any other characteristics that differ from one type design to another.
Font A font is the digital representation of a typeface. It is a collection of all the characters of a typeface in one size (12pt/1in) and one style (bold/italic). For example, Arial in 12pt size is a font, Arial in 18pt size is a font, and Arial bold in 24pt is also a font. Adobe's type glossary lists a font as “one weight, width, and style of a typeface.”
Designers choose typefaces to create their projects. Each typeface is known by a name, such as Helvetica, Arial, Times New Roman, etc. The term “typeface” originated from movable type, whose blocks of wood or metal each contain a relief image of a character on one surface (the “face”).
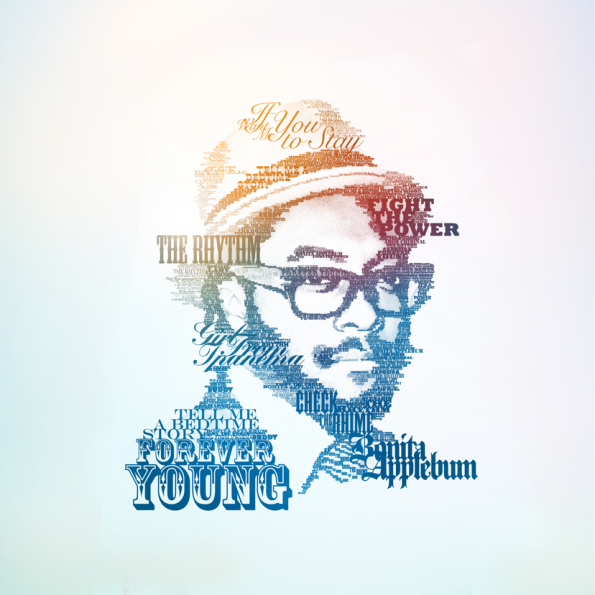
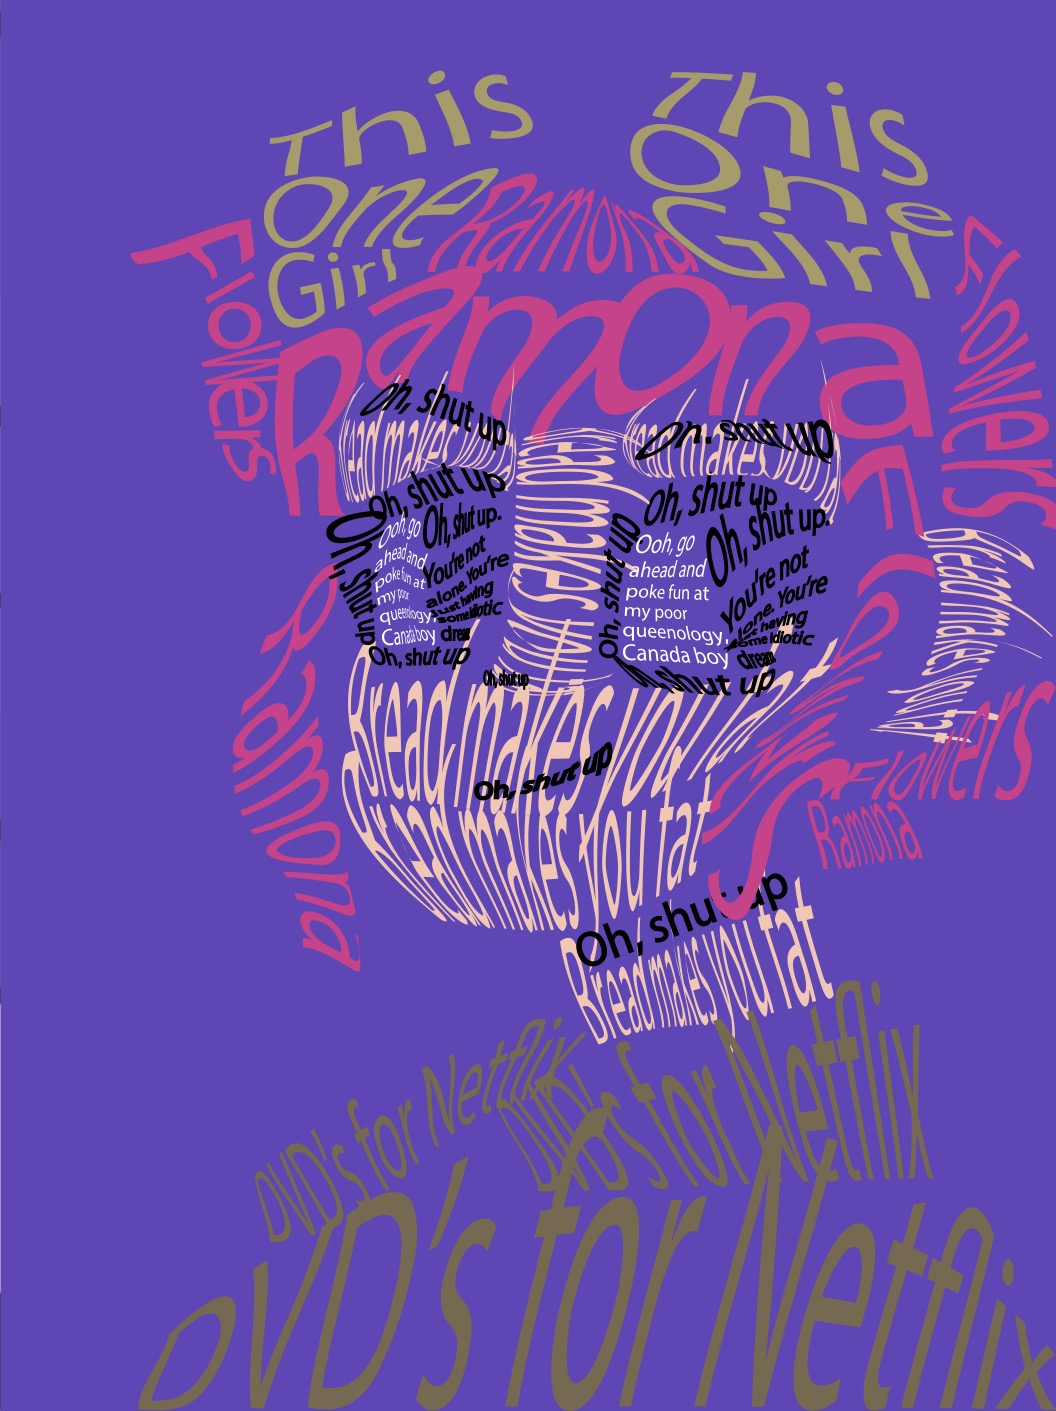
Assignment 1: Each student will choose 3 images to create using different fonts. In Illustrator use the Object drop down, go to Envelope Distort, then Make with Mesh tool. Then shape and distort the text to recreate the images.
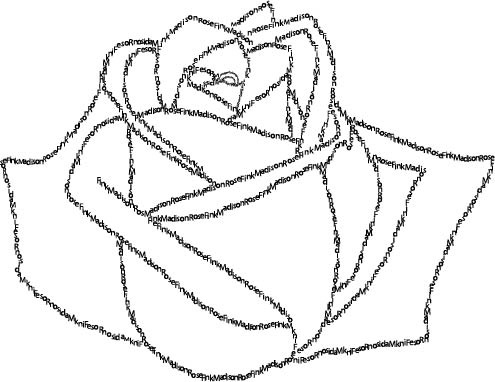
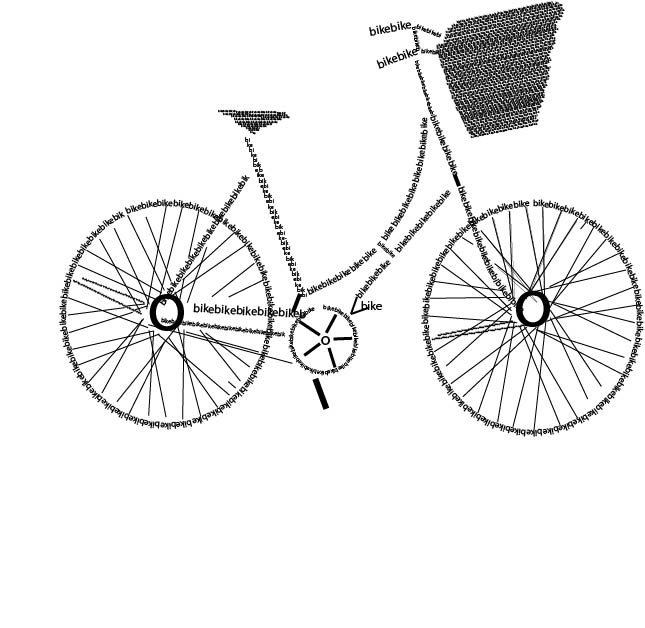
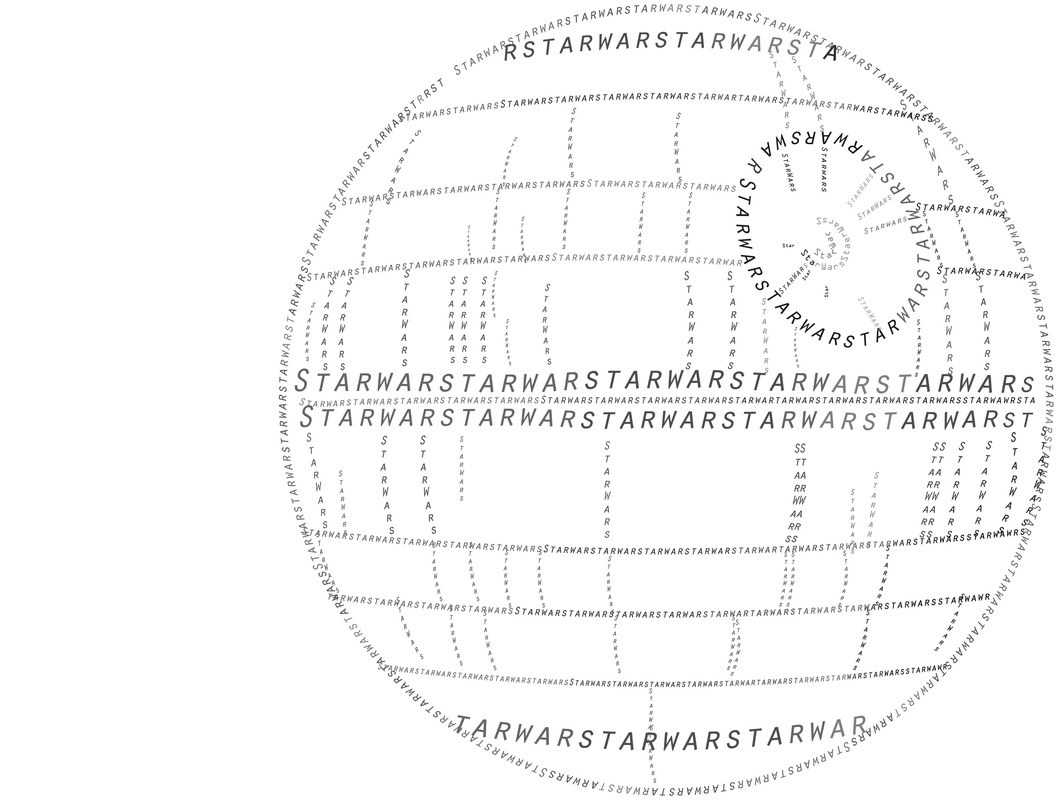
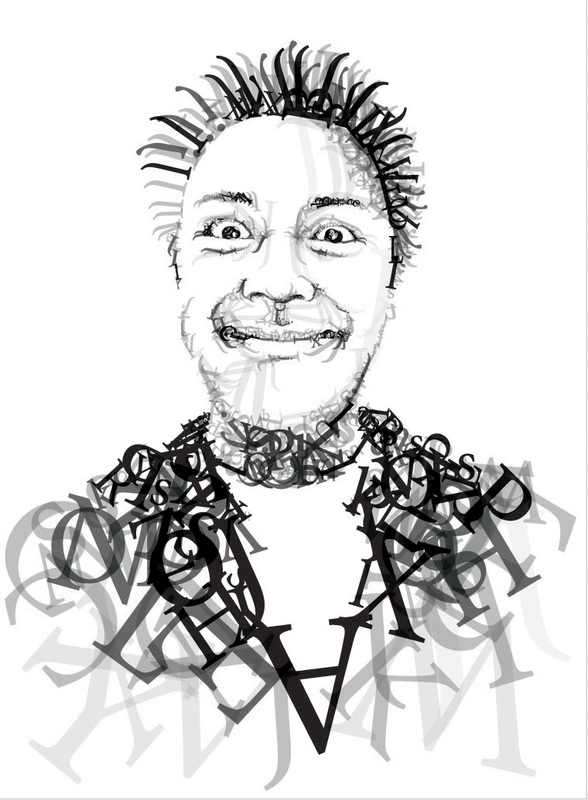
Assignment 2: Each student will create an image in Illustrator using the Type on a path tool. We will create contour paths on our images and then place text on those contour paths. We will use overlapping to create shading as well as text size and boldness.
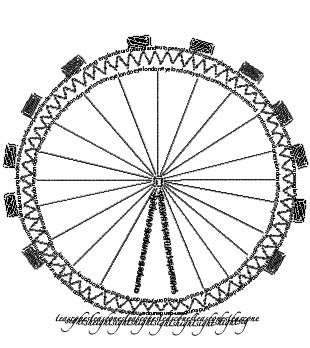
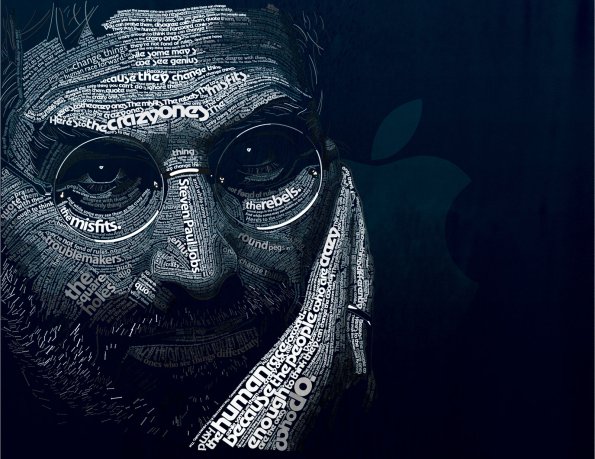
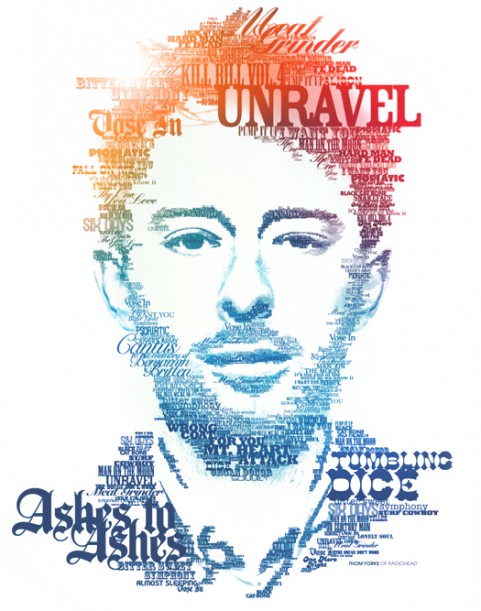
Assignment 3: Students will create one last image using only text. The will incorporate both methods used on the first 2 assignments.
CREATING YOUR OWN TYPEFACE: HOMEWORK
how to turn your drawing into an illustrator poster
As an alternate assignment you can create your own typeface. Your font must include 26 uppercase letters, 26 lowercase letters and the numbers 0 - 9. (Make sure to give your font a name.)
We will study and learn type classifications, font families, construction of a paragraph and the anatomy of typography. We will use fonts in Illustrator and the Object Distort Make with a Mesh tool to create an image. We will turn the font into shapes. You can decide if you want the text to be readable or just shapes.
Typeface A typeface is a design created by a typographer or type designer. It incorporates the specific letter-forms that include the variations of stroke weight, the forms of serifs, the counter shapes, the finial styles, the lengths of ascenders and descenders, and any other characteristics that differ from one type design to another.
Font A font is the digital representation of a typeface. It is a collection of all the characters of a typeface in one size (12pt/1in) and one style (bold/italic). For example, Arial in 12pt size is a font, Arial in 18pt size is a font, and Arial bold in 24pt is also a font. Adobe's type glossary lists a font as “one weight, width, and style of a typeface.”
Designers choose typefaces to create their projects. Each typeface is known by a name, such as Helvetica, Arial, Times New Roman, etc. The term “typeface” originated from movable type, whose blocks of wood or metal each contain a relief image of a character on one surface (the “face”).
Assignment 1: Each student will choose 3 images to create using different fonts. In Illustrator use the Object drop down, go to Envelope Distort, then Make with Mesh tool. Then shape and distort the text to recreate the images.
Assignment 2: Each student will create an image in Illustrator using the Type on a path tool. We will create contour paths on our images and then place text on those contour paths. We will use overlapping to create shading as well as text size and boldness.
Assignment 3: Students will create one last image using only text. The will incorporate both methods used on the first 2 assignments.
CREATING YOUR OWN TYPEFACE: HOMEWORK
how to turn your drawing into an illustrator poster
As an alternate assignment you can create your own typeface. Your font must include 26 uppercase letters, 26 lowercase letters and the numbers 0 - 9. (Make sure to give your font a name.)
|
| ||||
|
|


4.2
Project 4: Making art with Text. Discussion on the written word and how we can change font and size of text to reach new audiences and to spread the word of God.
After we study the anatomy and fundamentals of typography we will make an image using only letters. You can upload a photo as your original background to help you navigate, or you can draw lines with your pen tool. The more detailed your design is, the better your grade will be. We will complete two different projects.
First: We will distort text with the Gradient Mesh Tool in Illustrator.
Second: We will use the type on a path tool in Illustrator.


